This is an assignment on flight simulator reflection in aerospace for the AL Aerospace Engineering course at Concordia International School, conducted by Dr. Peter Tong (aka D.T). This article documents my experience with Microsoft Flight Simulator 2020 and how I reflected on the training modules.
Microsoft Flight Simulator is a perfect software for training flying skills. The first two chapters of Flight Training basically cover everything you need to learn for flying. After completing the first two chapters, you can fly a plane independently and complete a full flight on your own. The lessons’ overall pace is not fast, and the design is really well thought out. Basically, all the controls show up in the tutorials. But there are still some concepts you need to understand more deeply on your own, like the airspeed control mentioned later. As shown in Figure 1, the simulator lab is like that with multiple stations, where the environment is similar to a real flight.
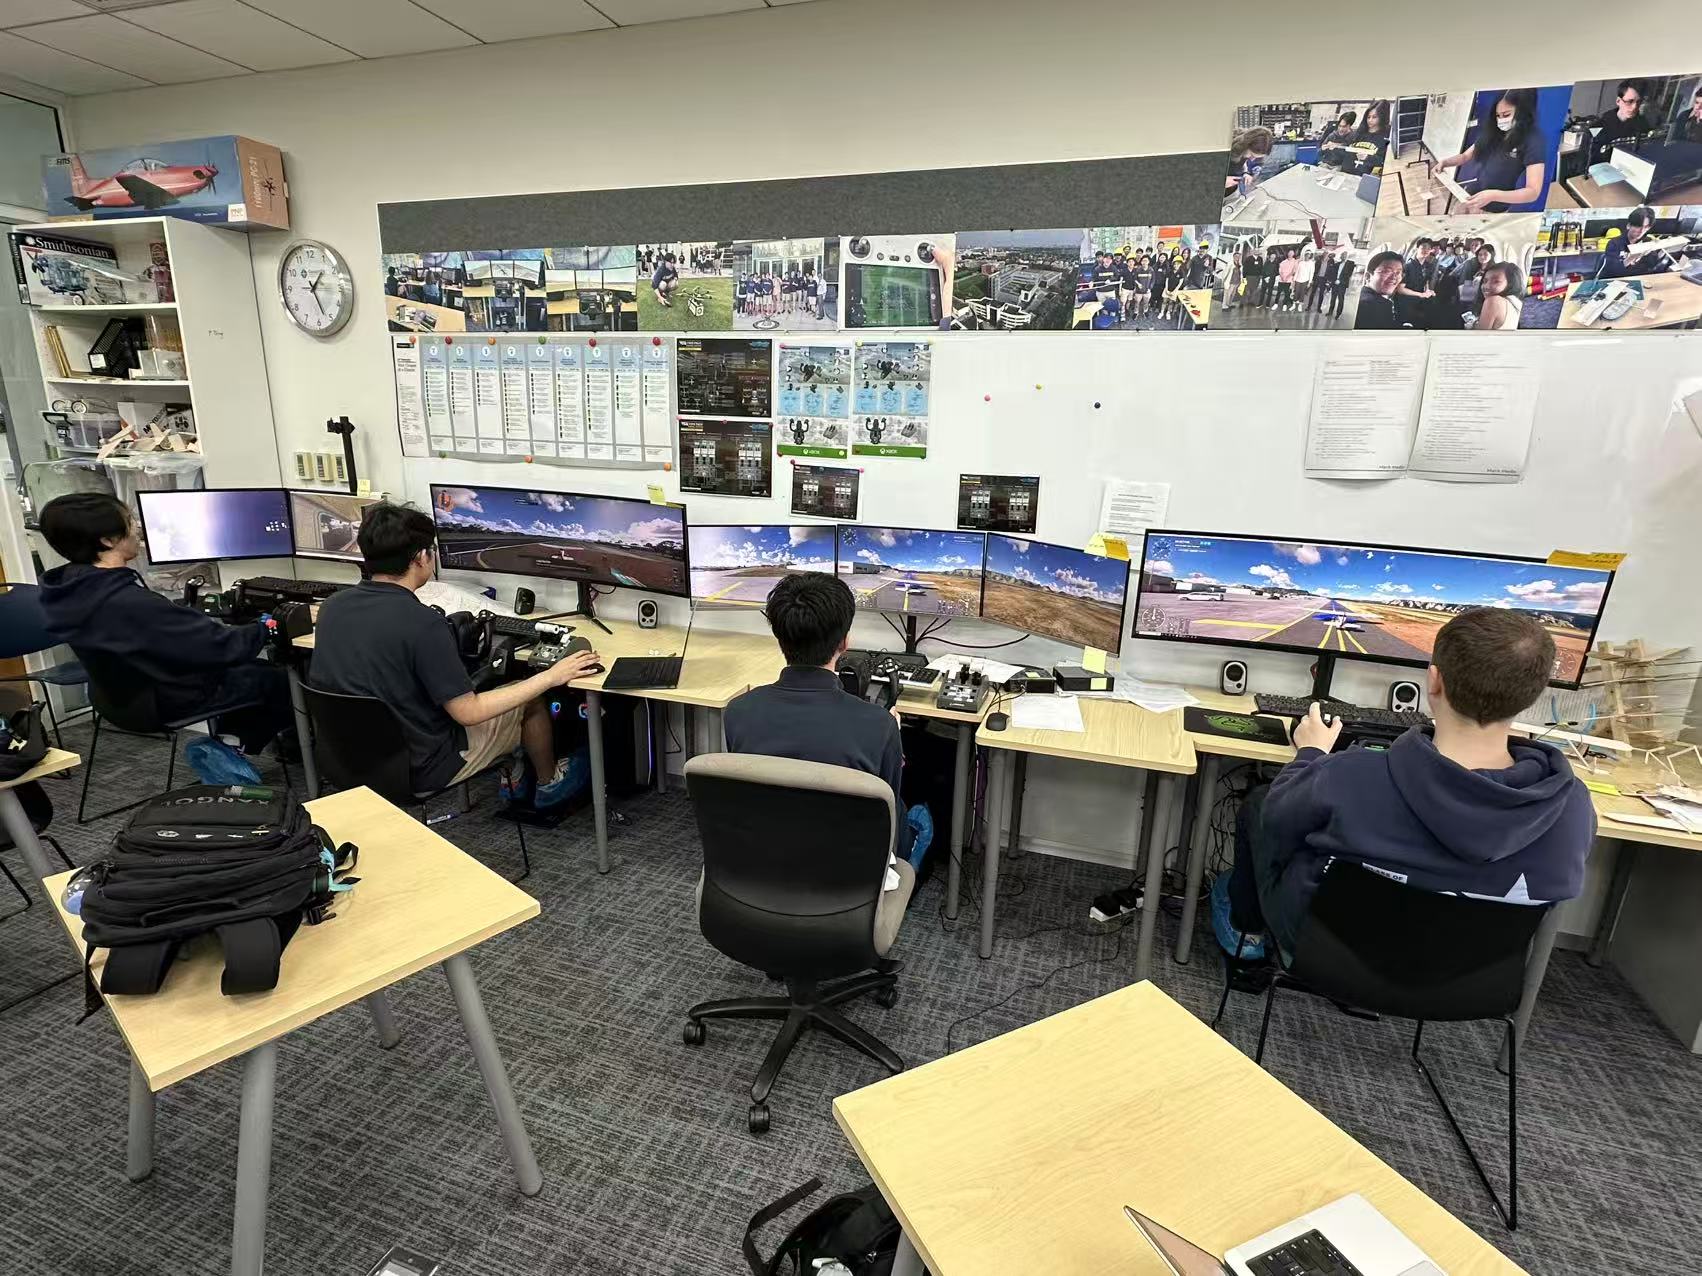
Figure 1: Overview of The Aerospace Lab
First of all, the Basic Handling chapter has no real difficulty overall. The first two Modules, Introduction and Aircraft Essentials, directly teach 80% of the content, including how to use the Yoke, how to use the Throttle, how to use the Pedals, and so on. It also tells you how to adjust the camera view in the simulator. This was very helpful for me, especially the switch to third-person view. I prefer the third-person view over the first-person view because it lets you see the whole aircraft and its state. Also, in this view, there is no cockpit instrument panel. Instead, there are indicators in the bottom-left and bottom-right corners. These are more intuitive and easier to read. Although in real flying you can never use third-person view, for beginners, this is a really nice feature. As shown in Figure 2, the hardware setup includes a Honeycomb Flight Yoke System and a separate Throttle Quadrant. The split between the two hands, one on the Yoke and one on the Throttle. Therefore, even though we are using a third-person view on screen, the control system is still the realistic one.
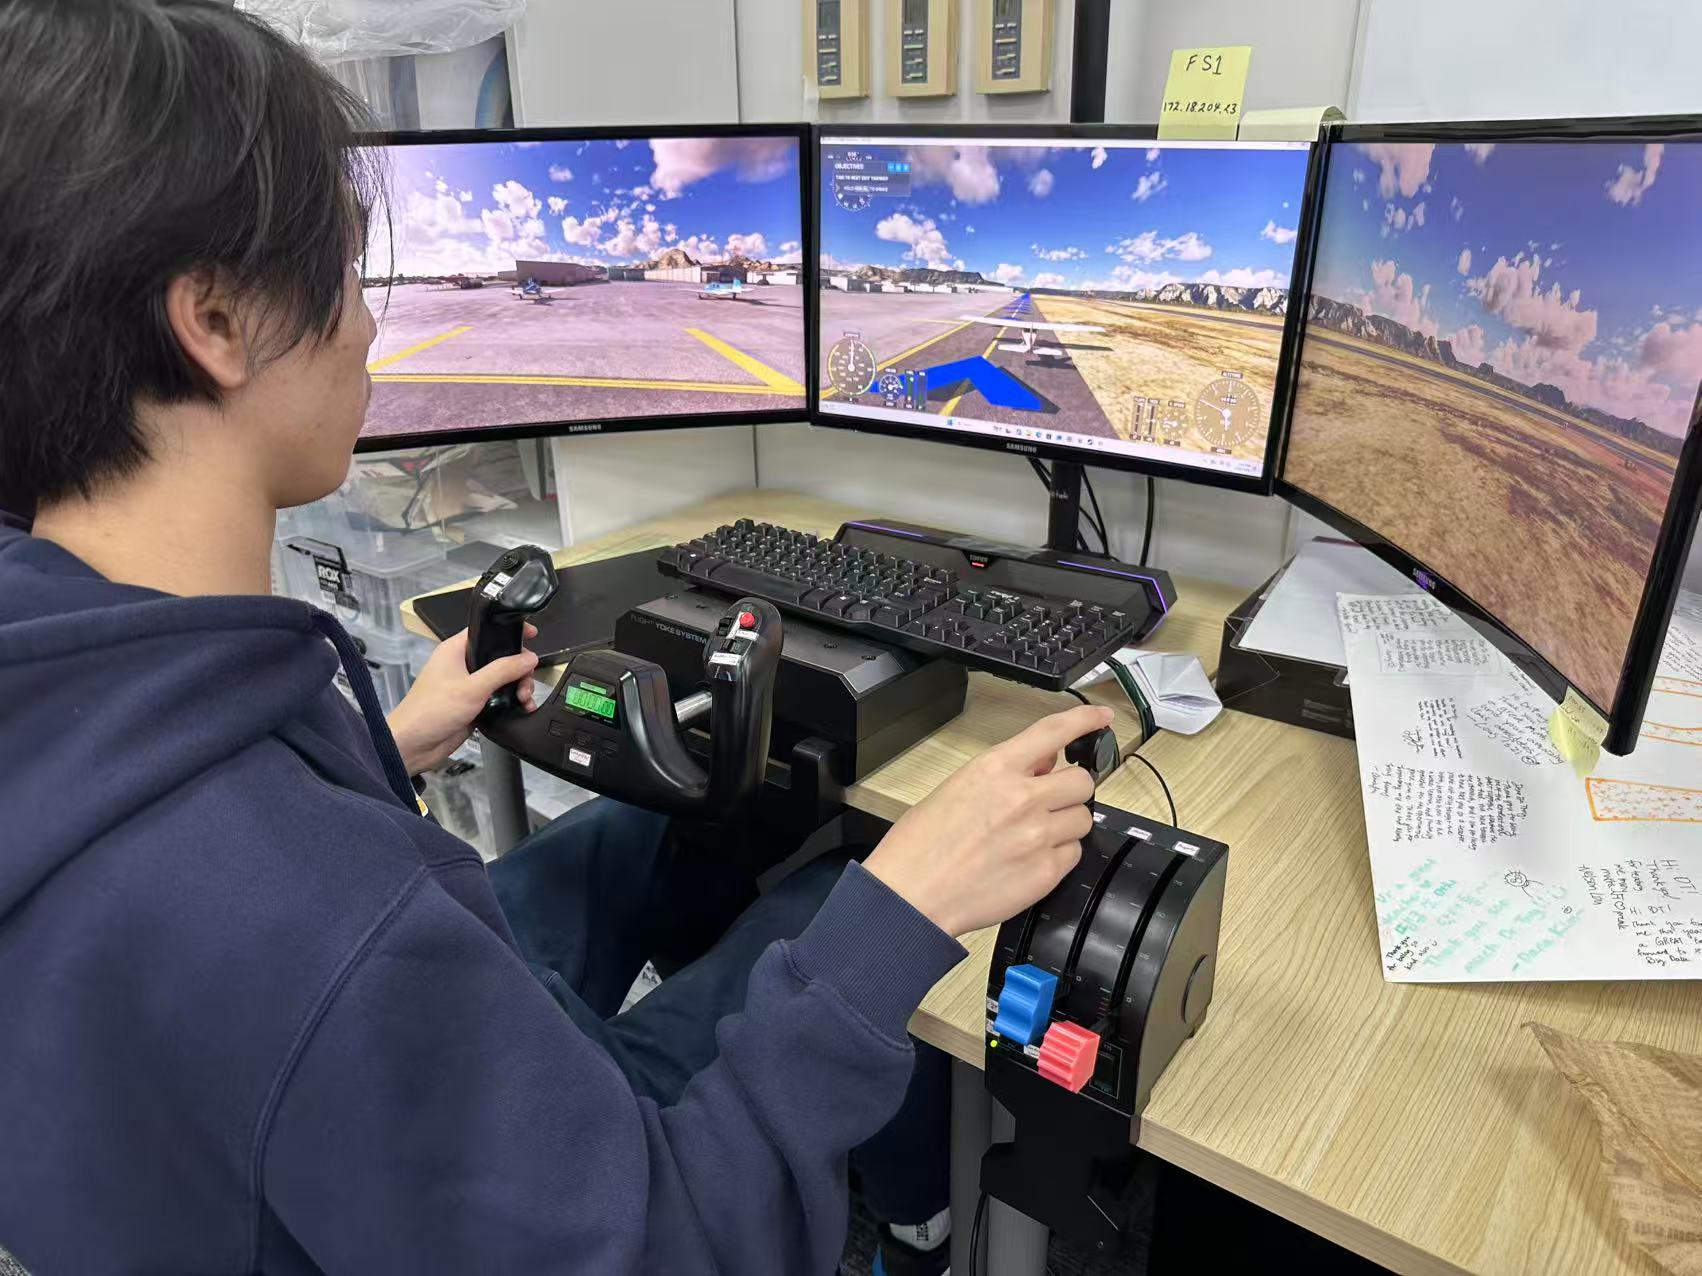
Figure 2: The Flight Station Hardware
The next three Modules are basically about Pitch and Roll operations, and you only need to adjust the Yoke. The tutorial deliberately emphasizes the specific function of adjusting the Yoke. In later flights, small and precise adjustments are very important. If you want to get a higher score, like an A, you need very precise adjustments, and these three Modules already lay the groundwork for that. Also, Roll and Pitch on the Yoke work differently. Pitch changes depending on the current Power, while Roll is a permanent adjustment. For example, if you roll 30 degrees to the left, even if the Yoke returns to center, the plane will still stay in the left 30-degree Roll state. You have to manually adjust the Yoke 30 degrees to the right to get back to level. The remaining three Modules teach Power control and Handling. These operations look very simple, but getting a high score still requires very precise control. Especially for Power Setting, if you want to maintain a certain altitude and keep a specific speed, you must have very precise Yoke and Throttle control. This is one of the hardest points in this chapter, and it is also the key to getting high scores in later chapters. The 7th Module teaches you how to read the instrument panel. The instrument panel has a lot of things on it and is relatively complex. If you are a beginner, you can just use the third-person view. That way, you only need to pay attention to the flight altitude in the bottom-right corner and the Power Setting and Airspeed in the bottom-left corner. One last point, in third-person view, after the plane frequently Pitches and Rolls, it is easy to get misled and unable to tell the plane’s real state, because the camera adjusts dynamically based on the plane’s state instead of following the plane at a fixed angle. In this case, you just need to tap the view button on the left handle of the Yoke once (Shown in Figure 3), switch to a specific view, and then switch back, and the camera will reset to facing directly at the tail of the plane. This works really well and saves a lot of work adjusting the view.
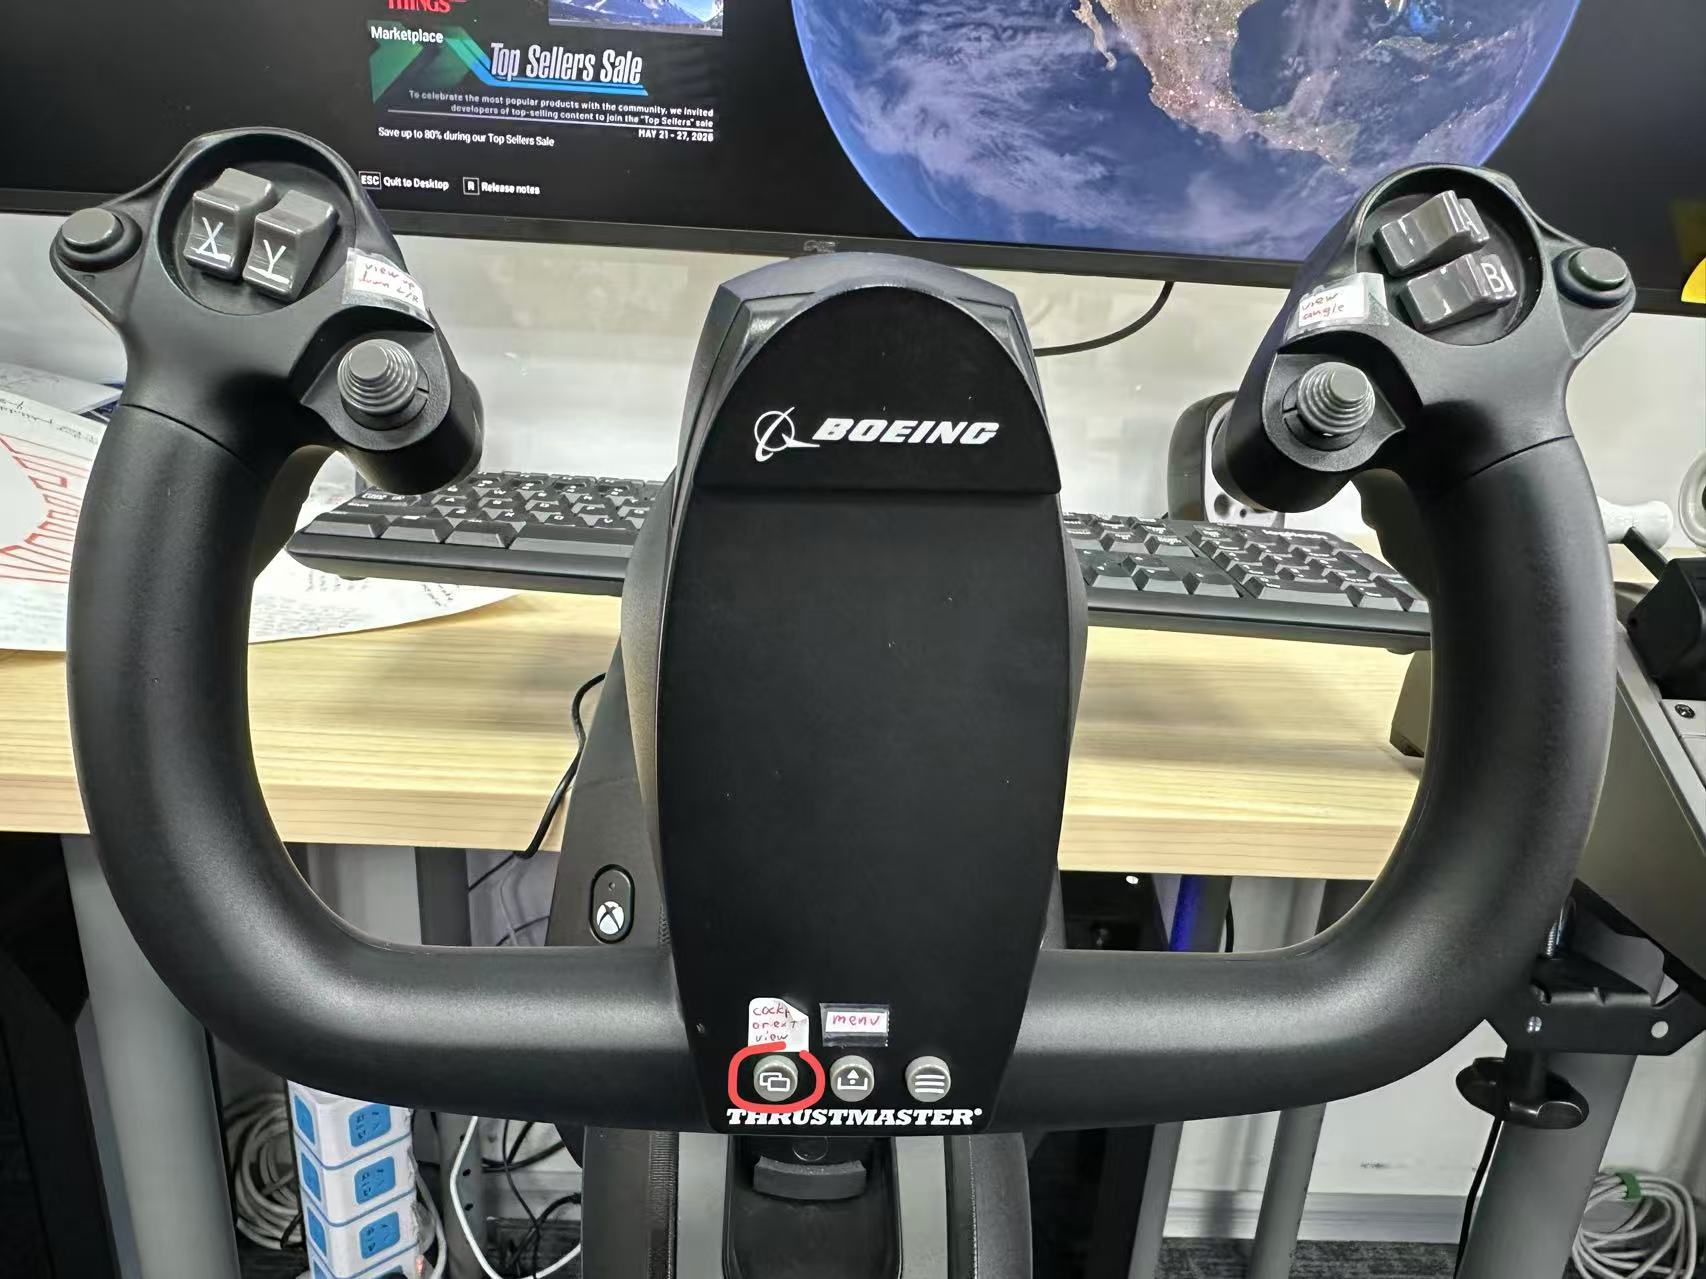
Figure 3: The View-changing Button on The Yoke
The next Chapter is the most critical part. Take-off and Landing are the two hardest parts of a flight, and also the parts where you lose points most easily. Especially Landing, which has very high requirements for Power and Yoke control. The first two Modules basically cover the operations related to take-off. Take-off is relatively simple. You only need to set the Power to max and then Pitch up. But pay attention to the angle of the Pitch adjustment. If the angle is too large, you might lose points. The next four Modules all go into detail about Landing operations, which shows how difficult Landing is. Personally, I have not fully mastered the philosophy of Landing. I have not truly and deeply understood how much the Yoke and Throttle need to coordinate with each other. This only becomes familiar through a lot of practice. During Landing, slowing down while controlling a continuously decreasing altitude is very critical. There cannot be any sudden altitude changes or angle changes. Here, you need to note that even if the plane is already perfectly lined up with the runway, it can still drift off, and you need to manually use the Yoke to correct it. Especially in a full flight where you have to adjust the plane’s position yourself to line up with the runway, the difficulty is very high, usually much harder than the Landing Module case, where the plane is already lined up. So in this situation, line up with the runway as early as possible, and then slow down at the right position. When you are about to touch the runway, you need to slowly pull up the Yoke. Too fast will cause the plane to climb again, and too slow will cause the plane to land at the wrong angle and bounce. After landing, use the brake to stop the plane. Note that the controller DT provided does not seem to have a brake button. You need to press the Num Delete key (Shown in Figure 4) on the keyboard to brake.
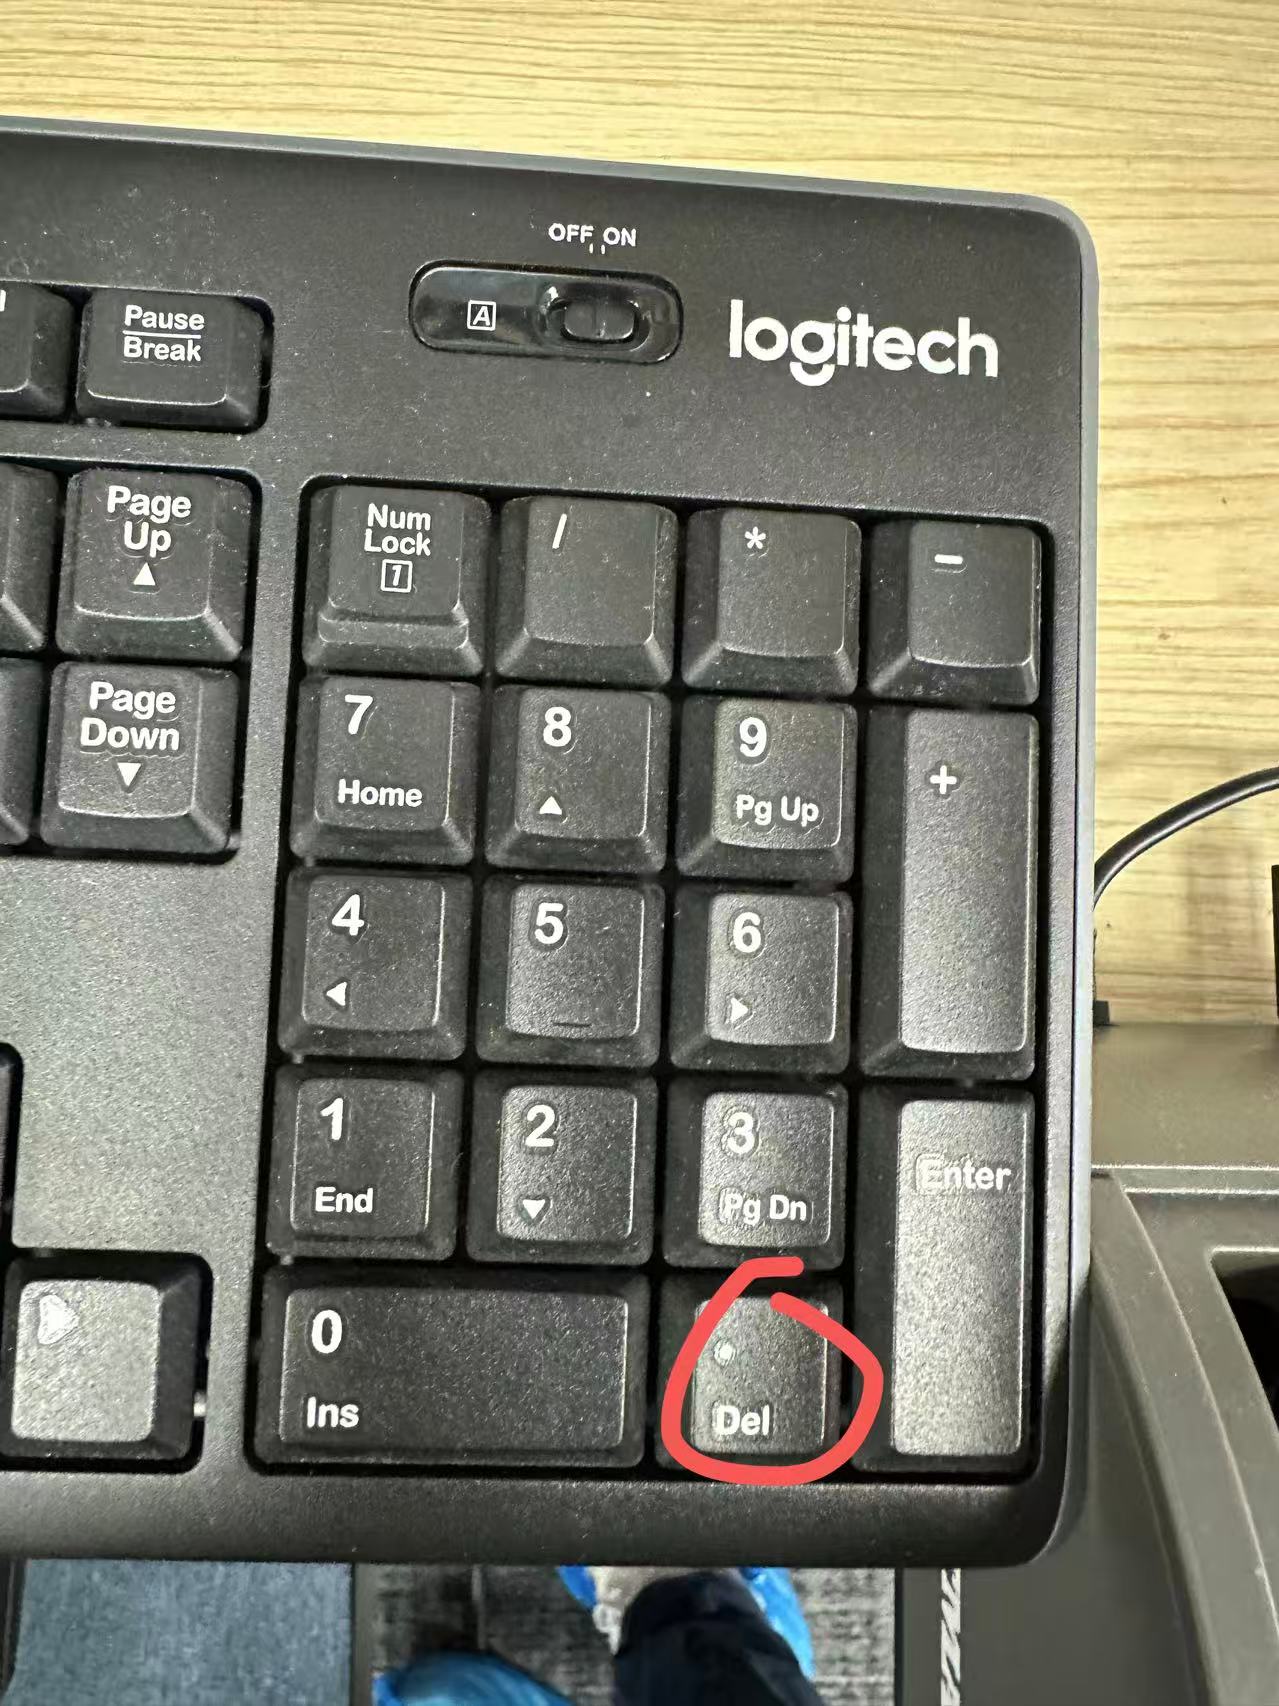
Figure 4: The Num Delete Key
During braking, if the plane drifts off track, you can use the Pedals to adjust the plane’s position and get back on track. As shown in Figures 5 and 6, after a lot of practice in the Landing Modules, I managed to always get A ratings in landing. It only became consistent after I started paying closer attention to the coordination between Yoke pull-up timing and Throttle reduction during the final process.
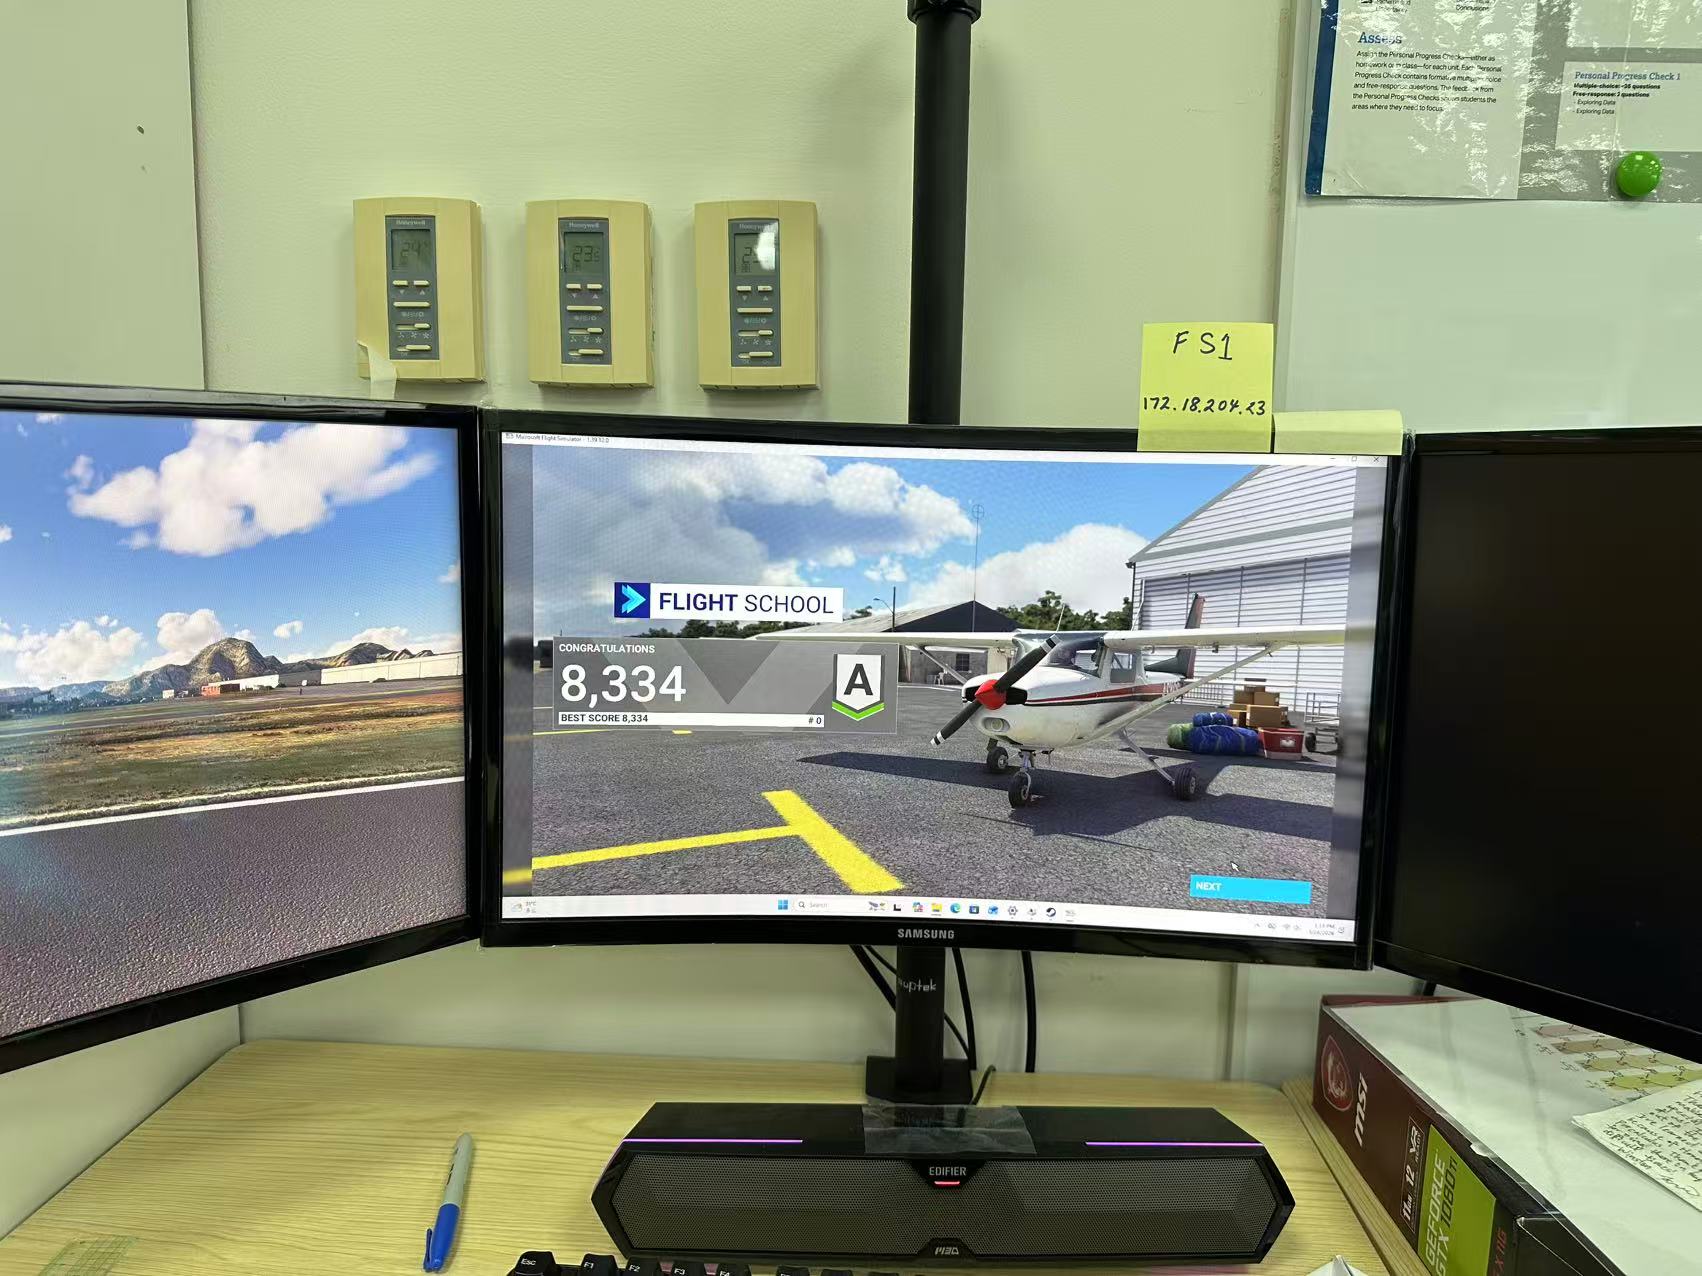
Figure 5: Completing a landing training module with a score of 8,334 and an A rating.
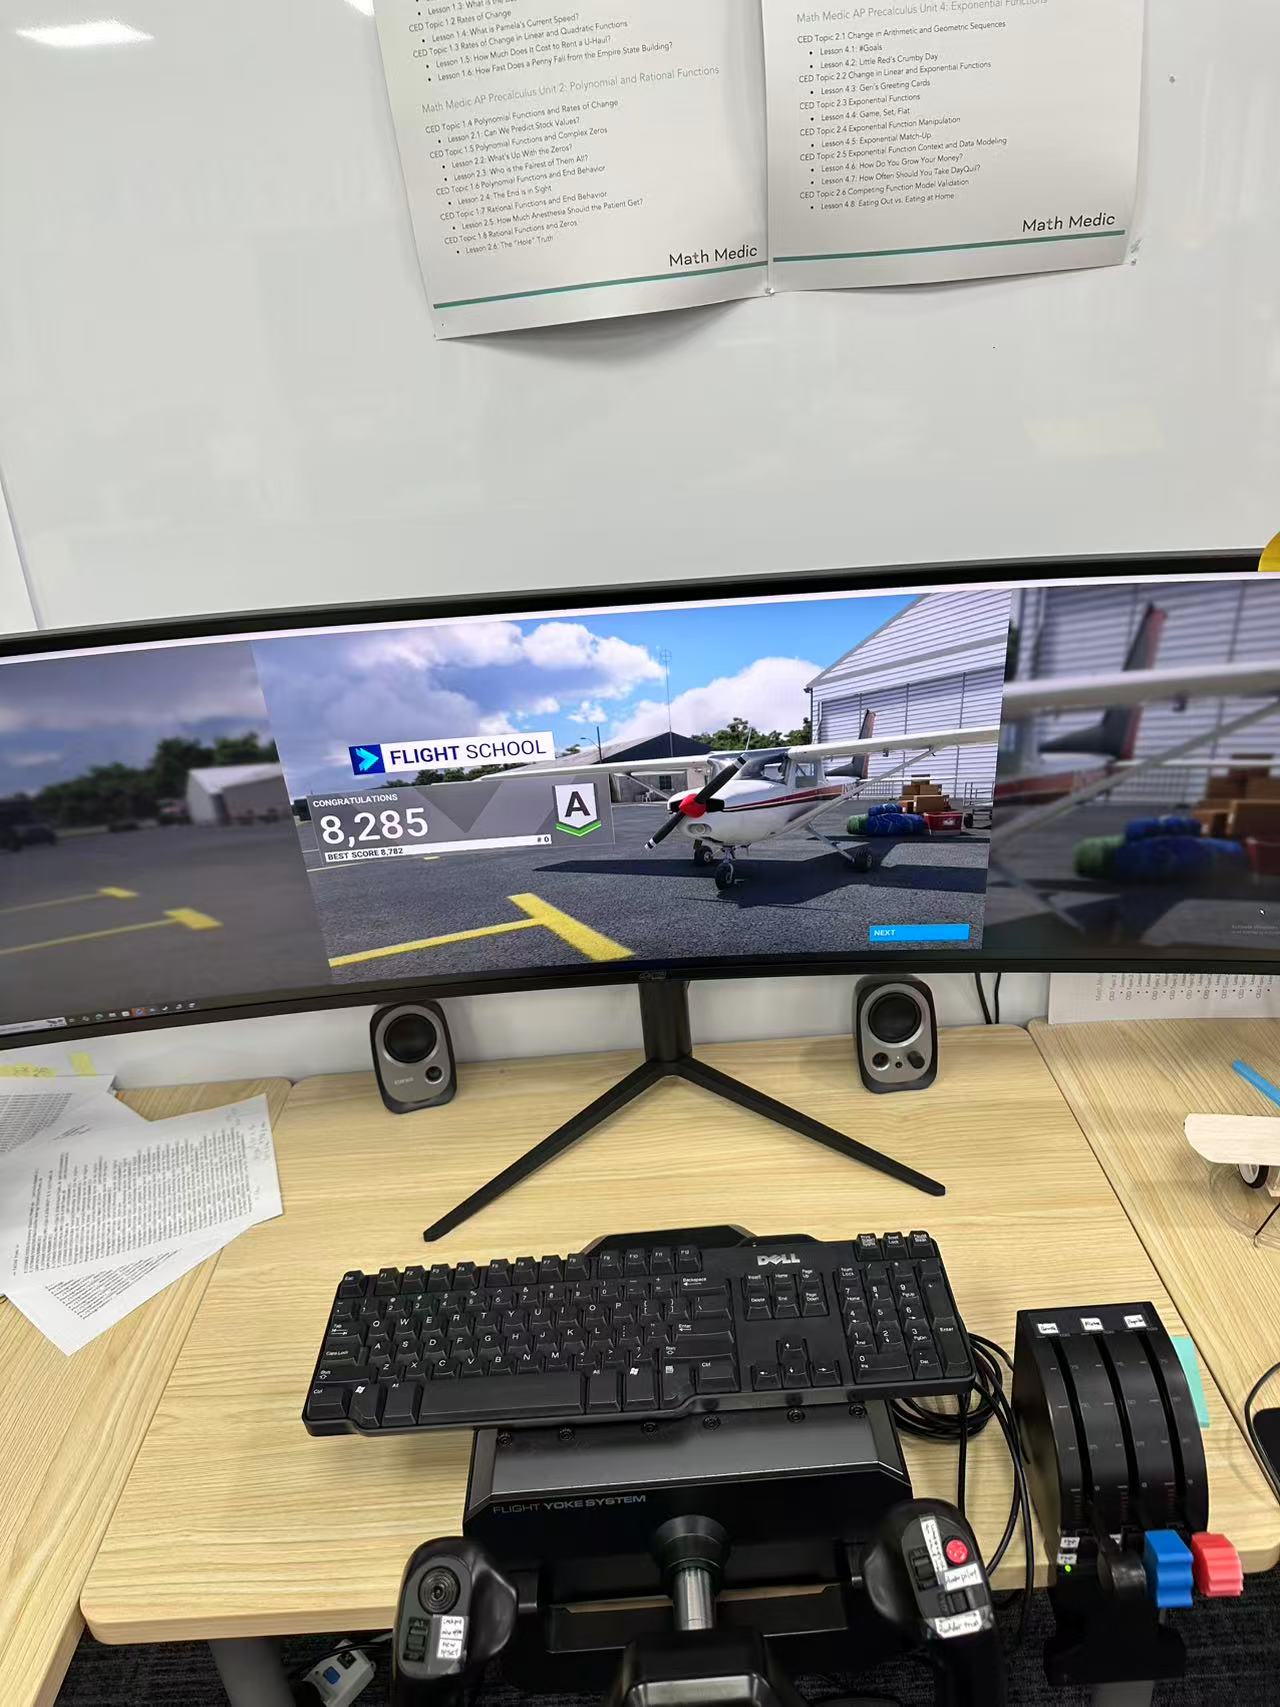
Figure 6: Completing another landing training module with a score of 8,285 and an A rating in another station.
In conclusion, this set of 15 Modules of flight training covers the core content of an independent flight. With more practice, you can fully master it and complete an independent flight. But if you want to get a high score, especially an A, you need very precise control as well.